How to Install WordPress on a Free Oracle Cloud ARM VPS with Ubuntu: Step-by-Step GuideHow to
I recently came across Oracle’s free tier service, which lets you create Ampere ARM Instances up to 24GB RAM 2Core CPU totally for free. Paired with a domain, you can host a blog yourself for less than 10€ a year! If you split your Oracle instances, you can have up to 4 Ampere VMs for free. I went for a VM with 2C and 12GB of RAM for a (very) smooth WordPress experience, but you can lower the specs for sure.
In the progress of creating the instance, you have to download the ssh key in order to access your VPS. If you are on Windows, I recommend you to use Putty to access your machine. My Mac already has a built in SSH client, so no need to download anything.
Connect to your VM via SSH (Mac)
You have to change permissions considering the files you just downloaded before you can connect to your machine. Navigate to the directory, where your keys are stored and change the permissions as stated bellow:
sudo chmod 400 ssh-key-????-??-??.key
Now, you can connect to the machine directly via Terminal. No need to download anything else like you have to on Windows.
sudo ssh -i ssh-key-????-??-??.key ubuntu@YOURMACHINESIPADRESS
Preparation
Now, we are in our free VPS machine.
Firstly, check for new software updates. This may take a few mins, so don’t worry.
sudo apt update && sudo apt -y upgrade
After updating the software, it’s time to install the necessary packages in order to prepare everything for our WordPress installation. Accept everything with “Y”.
sudo apt install nginx mariadb-server php-mysql php-curl php-gd php-zip php-fpm
In order to let your machine “send out data” outside its own enviroement, Port 80 needs to be opened.
sudo iptables -I INPUT 6 -m state --state NEW -p tcp --dport 80 -j ACCEPT

sudo netfilter-persistent save
Database Stuff
Create a user in mysql and give the created user the needed permissions . Replace the placeholders with your personal data and keep the apostrophes. The username does not need to match the OS Username or anything.
sudo mysql
create user 'YOURUSERNAME'@'localhost' identified by 'YOURPASSWORD';
grant all privileges on *.* to 'YOURUSERNAME'@'localhost';
Now as we created our user, we can start creating the actual database, needed for WordPress. You can name the database by replacing “wordpressdb”. The second command will reload all permissions.
create database wordpressdb;
flush privileges;
Exit Mysql.
exit
Install WordPress
Move to the folder, where you want your to install WordPress. In our case it’s /var/html.
cd /var/www/html
Before downloading and installing WordPress, we can remove any unnecessary files from the installation folder.
sudo rm index.nginx-debian.html
Get the latest version of WordPress from their official source.
sudo wget <https://www.wordpress.org/latest.tar.gz>
Unpack the downloaded files. A brief explanation of the parameters is down bellow.
x: Extracts files from the archive
v: Verbose mode, which lists all files being extracted.
f: Specifies the file name of the archive to be processed.
z: Decompresses the archive using gzip (typically for .tar.gz files).
-strip-components=1: Removes the leading directory level from the files in the archive (in this case removes the wordpress folder).
sudo tar xvfx latest.tar.gz --strip-components=1
Remove all unwanted files. The -rf parameter is needed if you want to remove directories without asking for permission.
sudo rm latest.tar.gz
Tell the Webserver your Domain name. I personally use the nano text editor, but you can use any that you have installed.
cd
sudo nano /etc/nginx/sites-available/default
Change the following:
index index.html index.htm index.nginx.debian.html;
server_name;
to
index.php;
server_name YOURDOMAIN.COM WWW.YOURDOMAIN:COM;
AND change the following (you just have to remove some hashtags in this case)
        #location ~ \\.php$ {
        #        include snippets/fastcgi-php.conf;
        #
        #       # With php-fpm (or other unix sockets):
        #        fastcgi_pass unix:/var/run/php/php7.4-fpm.sock;
        #       # With php-cgi (or other tcp sockets):
        #        fastcgi_pass 127.0.0.1:9000;
        #}
to
        location ~ \\.php$ {
                include snippets/fastcgi-php.conf;
        #
        #       # With php-fpm (or other unix sockets):
                fastcgi_pass unix:/var/run/php/php7.4-fpm.sock;
        #       # With php-cgi (or other tcp sockets):
        #        fastcgi_pass 127.0.0.1:9000;
        }
You can exit by pessing CTRL + X, accepting with ‘y’ and pressing ENTER.
Now, after editing the nginx config file, you can check if everything is okay with it by the following command.
sudo nginx -t
Lastly, we can restart our Nginx server and afterwards we should be able to start configuring our WordPress installation via WebUI.
sudo systemctl restart nginx
The command sudo chown -R www-data:www-data /var/www/html changes the ownership of all files and directories in /var/www/html to the user and group www-data, which is typically used by the web server. The -R option makes this change recursive, applying it to all subdirectories and files.
sudo chown -R www-data:www-data /var/www/html
WordPress configuration via WebUI
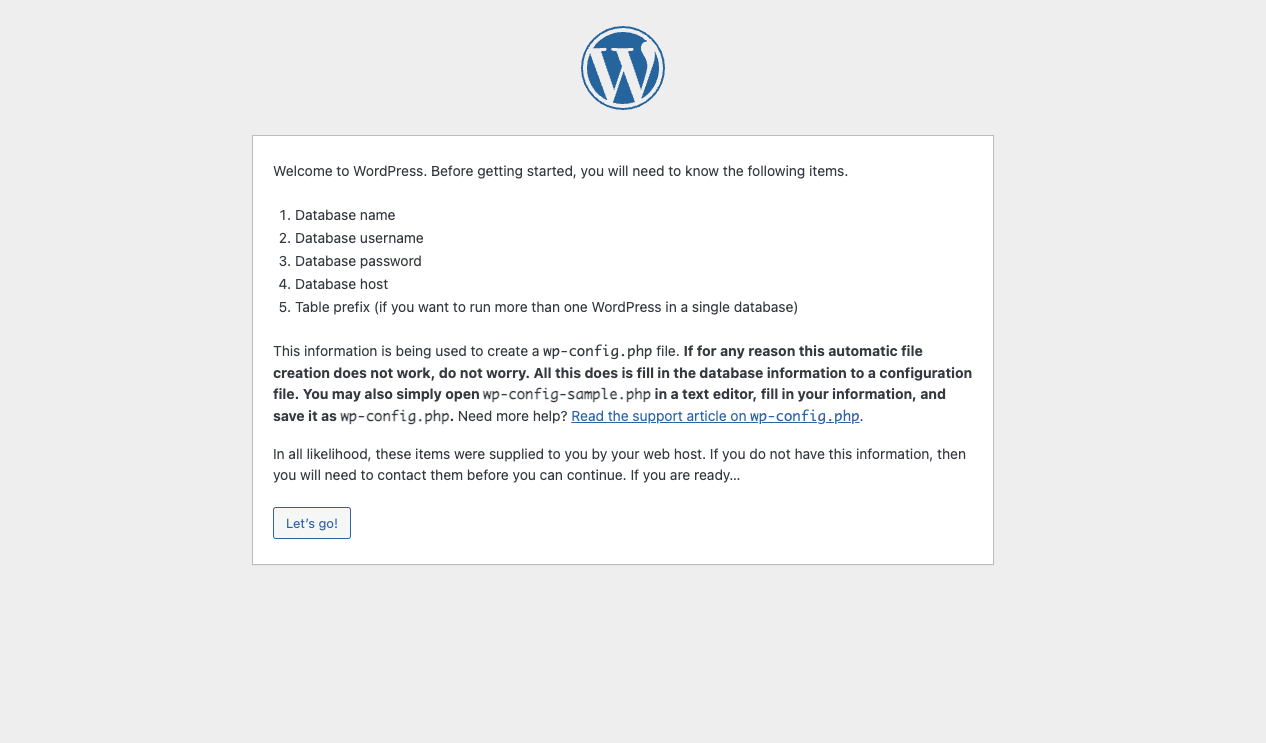
If you followed the instructions correctly, you should see the following page when opening your IP/domain in your browser.
If you still see the old Nginx file, this may be a problem of Cloudflare caching your Website. Temporarily entering your IP directly will solve this problem.
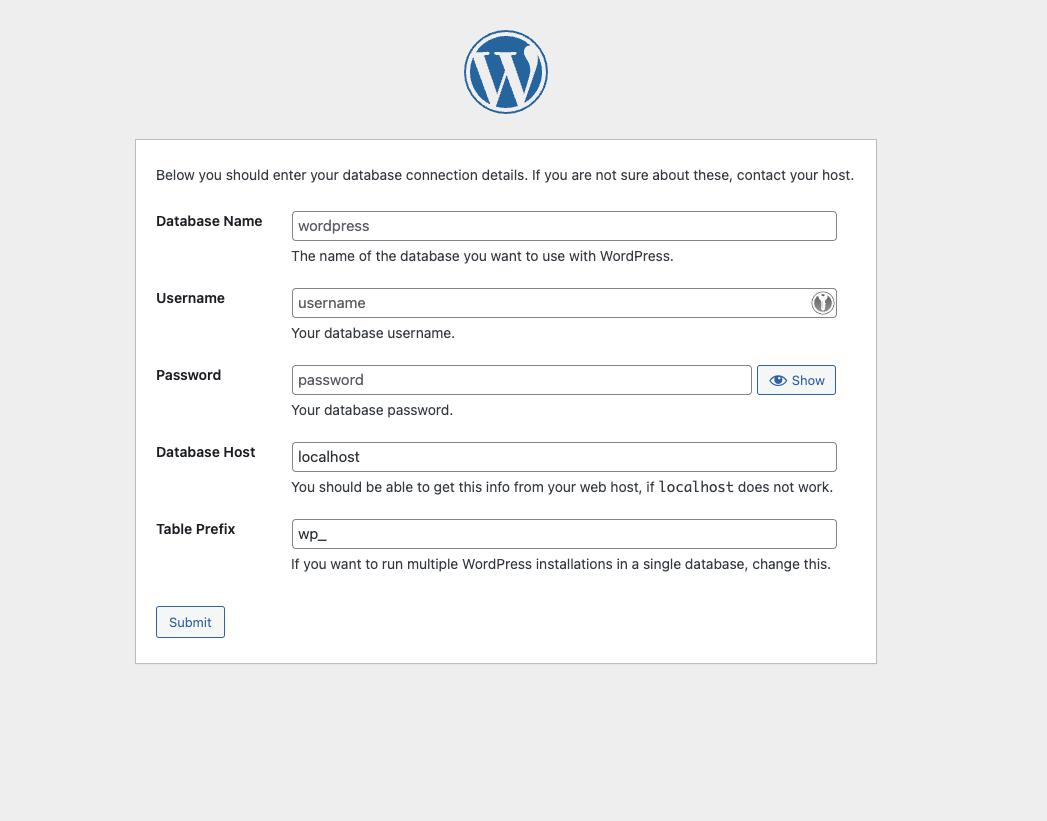
You can now carefully enter the before created database credentials.
That’s it, you should now have a fulll WordPress installation running on your VPS, totally for free!